As the last workshop for AE, we made a showreel to present all the workshop work we have done during this year. I also put some personal work. I just simply change the clip with the music beat.
Music by Poddington
As the last workshop for AE, we made a showreel to present all the workshop work we have done during this year. I also put some personal work. I just simply change the clip with the music beat.
Music by Poddington
Finally we are making the final version. It becomes a team work rather than individual. We have 16 papers which are larger than A3 to make a huge poster. (So I can’t scan the final in) Our team just simply working on four typographies and four words. The result is shown in the following video. We have to take the video from 2nd floor.


It is so cool when the poster is so huge and looks perfect even from a distence!
As we work along with this workshop, we are producing an advertisement which promotes our university.
Below is the working process.
Select the edge of the opening and right click, choose Close Polygon Hole and the opening will be closed smoothly.


We are guided to animate the objects wint joints in Cinema4D.
The video is a collection of achievements.
Following is the process of making.


A development platform for creating 2D and 3D games is introduced to us. It is free to downoad from the official website and even can make the game playable outside of the program.

 A model of game is shown to us at first. The workspace is similar to Cinema4D and also how an object is moved.


So we start with opening a new project from File.


Go to Game Object > Create Other to create a floor (Plane) and a ball (Sphere) and light (Directional Light).
Right click at the window of Assets and go to Create > C_Scriptand we will start creating code.


Using the code in the image and the ball will be able to roll with the arrows on keyboard. Always make sure the bracket is a pair otherwise the command can not be activated.


Adjust the camera’s position and angle can change the vision of player. Then create walls by creating Cube.


The code gives walls the ability to stop ball from passing through it.


Create Material to change the ball’s colour. Add code to camera so the player’s vision will follow the ball when it is moving.


Add a cube and make code for rotating.

The following code enable the ball to pick up the cube.

Once the setting is completed, we export the game to our wanted gaming panel. Then when the files are moved into device, it is playabe.

From the previous assessment, I received some advices that can visually improve my animation contents.
If by any opportunity, I also want to do experiment with different style in animation and character design. Background is also important to produce concept art. The concept artists are just so awesome…for example, The Maze Runner’s.
This is a practice that using camera layer to create a 3D like vision in AE. Firstly we have to have the images to work on.

Objects have to be separated into layers for following step. I have used the PS files, but actually Illustrator file is better since the camera will be very code to the images. If using PS file like me, the images will become pixelate when the camera is pulled close to it.
Create the camera layer and create distance between the images. Use Point of Interest and Position in the camera layer to create track.

Pre compose can keep the original composition a bit tidier.

Change Track Matte to Alpha Matte so the texture below the mountain will show.

In my work, the rest of it is just rotation and other basic changing. Apart from that I have used the Page Turn Effect on the fence.
This time I have only grabbed a limit of texture so I even used the grid produced in InDesign. The final outcome is quite interesting.
The video is alright just because it is not in HD.
This is our second time producing typography, what makes it different from the first time is that this one is more free to create any form. So we firstly try to make different style for every letter, then choose some that is preferable to work in further progress.

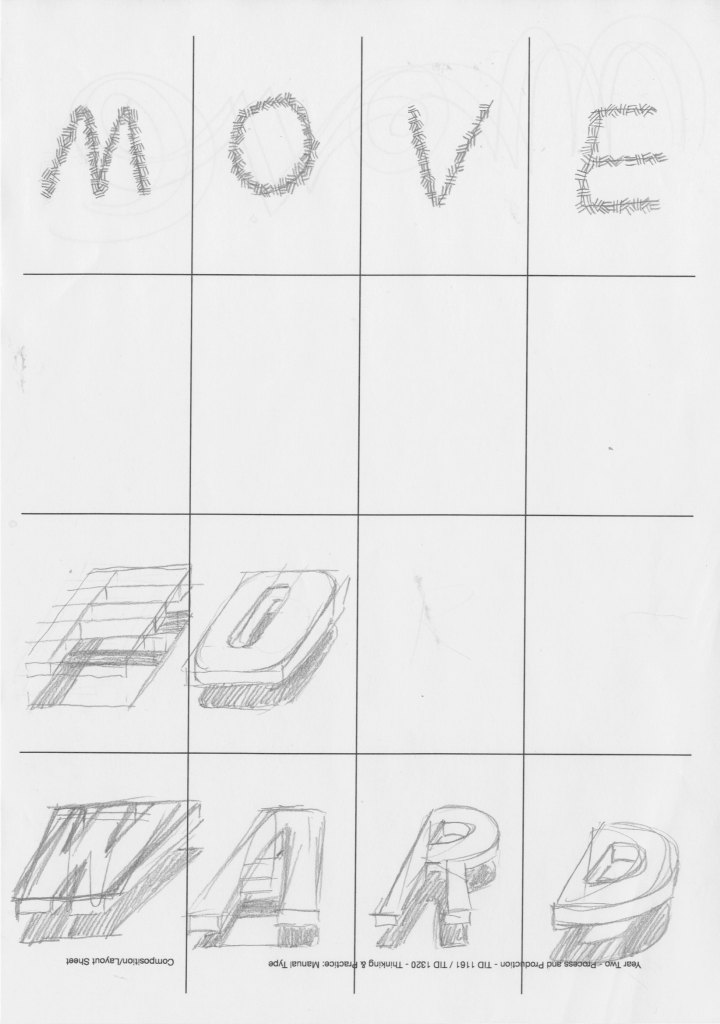


Tutor suggests me to have a font that is more regular instead of images since it might be challenging when creating other letters. I was trying not to follow the advice but eventually follow it.


Eventually I chose this one for the final outcome. It seems easy but a well understanding of perspective is required.


The last step is to finalise it. I will give a fine line to it and correct the faults in the structure.
